Playstation 2 Emulator For Mac OS X

This guide shows you how to install the Playstation 2 emulator for Mac OS X. Computers are getting more and more advanced with powerful hardware, so it is possible to turn your Mac computer into a Playstation 2 console. While one may fear treading onto the line line of piracy. No worries, it is not illegal if you own the console and games.
Lets put it this way, you have an outdated game console and a whole set of games in your shelves. You have the latest game console hooked up to your tv console. It is going to be a tiring chore to remove the cables and swap this console in place. Answer? Install the Playstation 2 emulator for Mac OS X.
After all, as long as the console has already stopped its production and no more support is rendered to the console, there are no more new games for that particular console, it is not like resorting to the use of emulators is going to hurt its sales in anyway. Since it has already sold out all of its stocks. The only deals that exist will be just the second hand sets going around in flea markets.
Step 1
Install all the required software.
1. PCSX 2 emulator
Download the PS 2 package from here. Install it, easy as pie.
2. Install X11
This is a latest version of X11. After installing, it will prompt you to log out and re-login. Remember to do so.
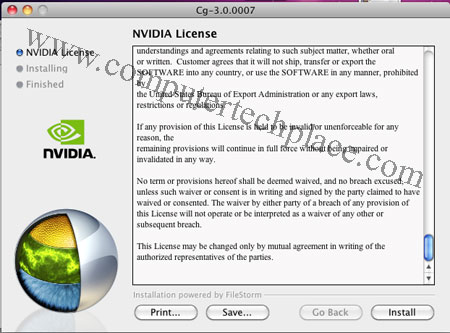
3. Install the Nvidia CG Framework
You may wish to do a reboot so that all the installed software will have its appropriate settings written into place.
Step 2
Insert the Bios files
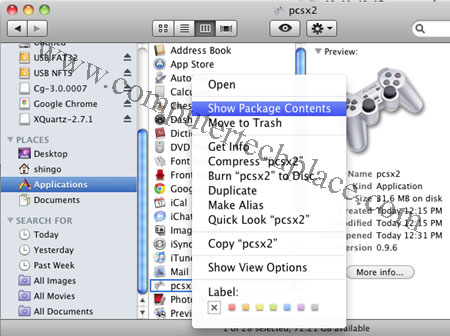
We will need to insert the Bios files into the correct folder. The bios file something that allows the the Playstation 2 the abiltiy to read and interprete the games. Start the Finder, in Finder directory, select “Applications” , => PCSX2.
Right click on the PCSX2, select “Show package contents”. Navigate to Contents => Resources => PCSX2
Create a new empty folder called Bios. Paste the individual Bios files into the empty Bios folder.
Step 3
Run the softwares.
You must click on “Applications” => “Utilities” => “XQuartz”. Run XQuartz first. You will see nothing but a white prompt that looks like the white version of the Terminal.
Run PCSX2
Click on “Applications” => “pcsx2”
If you do not run the XQuartz app, you will not see anything even if you run the PCSX2 app.
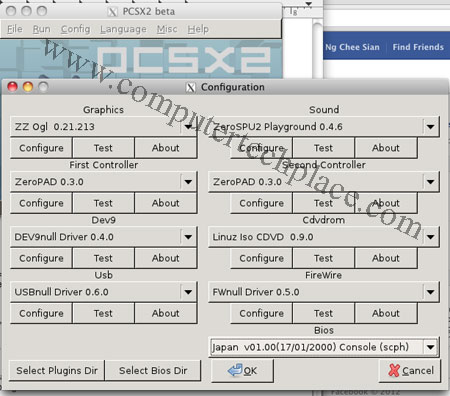
After that via the PCSX 2 configuration page, set the Bios folder to point to the correct place. Run the PCSX2 App and Click on “Config”, => “Configure”
Click on the “Select Bios Dir” box and make sure it is pointing correctly to the place where you inserted the Bios files. If you did that correctly, you will be able to choose between a few Bios Consoles. The reason for having a few Bios is because some games such as Dynasty Warriors have the Japanese version and the US version. You will need to swap to the respective Bios or the game may not work. Click the “OK” button, to close this configuration window.
Step 4
Run games.
Before you can run the game, you must rip the whole game out using software’s such as Clone DVD or IMGBURN. Even though this emulator allows you to run via CD/DVD, it will be so slow until it is going to be unplayable. I recommend using the “File” => “Run ISO Image” Choose and point to your game. It will be more convenient to copy and paste the games somewhere near the Bios folder for easy access. Or you will need to navigate through the entire directory all the time.
Step 5
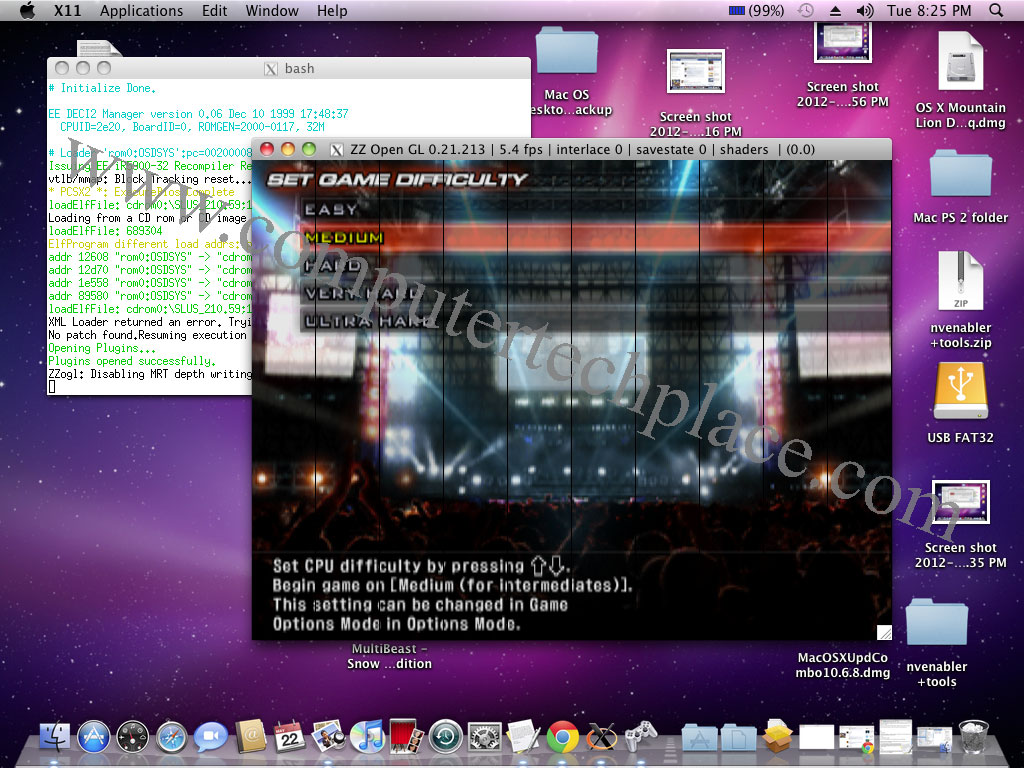
Enjoy the game. I admit that the game speed is not playable at all on my Hackintosh Mac. My Mac does not contain the true drivers from Nvdia and it is only a Core 2 duo. I believe it will be playable with real Mac computers and powerful Intel i7 cores.
This Playstation 2 Emulator For Mac OS X guide will make your Mac something that is no longer inferior to a Windows PC, don’t you think so?


Leave a comment