Partition SD Card For Android Swap File

 Partition the SD card for Android to use Swap File is very important as it can help to speed up an Android build that is running off the SD card. As more and more custom ported Android roms get bigger in size with every release, having a larger data.img file is no longer the feasible solution in the long run. In this guide, I will show you how to partition the SD card so that it has EXT 3 and Linux swap file which is very close to having the Android installed on a drive. This method of having partitions in SD card will not be faster then flashing it directly into the internal rom. But it will boost the overall performance of an Android build significantly.
Such a concept of having the ext partition in the SD card is also applicable to the Android that is flashed directly onto the Nand rom itself. Users of Clockwork mod recovery will be familiar with the use of the additional partition you need to create on the SD card so that big Android builds that have the Sense UI can have some of its installation files stored on the additional partition.
First of all, download the MiniTool Partition Wizard Home Edition 5.2
Step 1
Create a Fat 32 partition
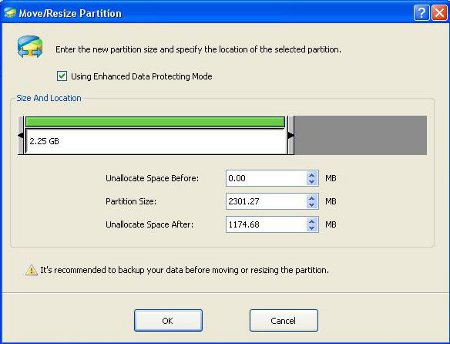
Remove your SD card Insert your SD card into the card reader of your desktop computer. It will get detected as an additional drive and show up in the partitioning program. Assuming that you have the SD card a single partition on its own without having partitioned them before. Right click on your SD card’s partition and select “Resize”. Click the black arrows and hold on to the mouse to drag and resize the partition to your desired value. This is the place where you will put all your Android files and also the partition that is accessible by Windows.
Step 2
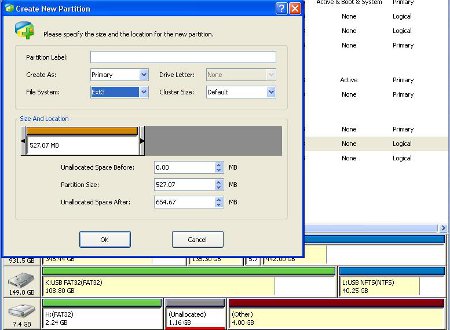
Right click on the remaining free space in grey and create a new partition. Change the parameters to Ext 3. Set the “Create As” parameters as Primary partition and once again drag to resize it to your preferred size. This is the space where the Android build will store it’s system files. Imagine that this is the place where the Android will install itself to. A good value will be about 500 meg.
Step 3
Create a Linux Swap File partition

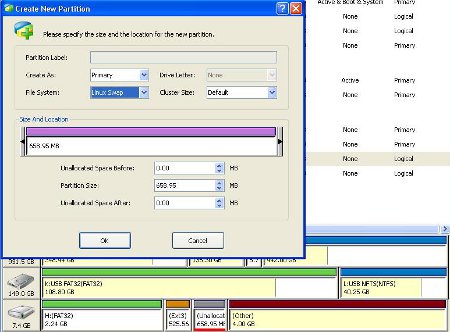
This Linux Swap File partition acts as the subsitute for rams, since running off the SD card is obviously slower then running off the main ROM itself. Right click on the last partition in the SD card and select “create new”. Choose “Linux Swap” as the File System. Click ok. Now you will need to click on the Apply button on the top left hand side of the partition program.
Once the program finishes its partitioning, simply copy your Android build into the fat32 partition that you have created. Only the fat32 partition is visible to the system. Android builds that are fast to begin with will not have a lot of significant improvments. But builds that are huge, that have 200 plus meg in size will be laggy and slow in they are running off the SD card. These builds will have a huge difference in smooth rendering and speed improvement.
I hope this article will be of use to the people who use Android out there.


Leave a comment