Install Chrome OS Onto Comapq
Chrome operating system seems like a very special operating system in the market that is touted to be very light weight, fast, starts up and shuts off in seconds and serves its purpose for office working class who really need something that will turn on and off in a blink of an eye. This will allow them to send emails, and surf the net just to read the news in the fastest possible way. In the business world, time is money.
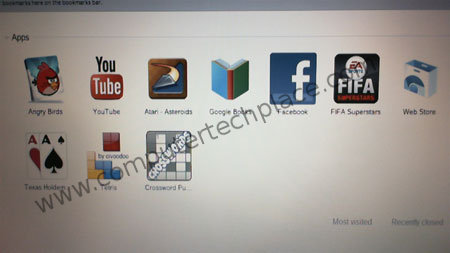
Chrome operating system is the dream come true for every working class out there. I have installed and played around with it. Disappointments and praise for this Chrome operating system are both included in my review of it. The disappointing part is the lack of a real desktop user interface, imagine not being able to save anything proper and view it on the desktop. To those who are ever curious as to see what a Chrome OS is like. It looks and functions and behaves 100% alike to the Chrome browser. You will by pass a login screen and all you get is just the full screen blown up Chrome browser windows and you can add tabs after tabs. The praise for this OS is that it is really fast, blazing fast when it comes to rendering of web pages and viewing of Youtube videos.
But don’t expect a full scale support for this Chrome operating system because it is a free and open source operating system. The reason why I am blabbing so much here before the exact guide is because if you choose to install the Chrome OS into your laptop’s hard drive, it will wipe your whole computer empty with just the Chrome OS. But you can still opt to run Chrome OS off a thumb drive without messing with your system in your laptop. You have been warned. Lets begin.
Step 1
Get a spare and blank thumb drive
I use a Sandisk 4 Gig Cruzer thumb drive for this installation. You will need to download your Chrome operating system. There are currently 3 sources to choose from. I will list them all.
This Chrome OS is a modified and custom made build with a lot of drivers and files packed in to be suitable for a huge range of desktops, laptops and netbooks. Most users should be downloading this file. I have tried this built but it failed to load up on the Compaq CQ 40. However it worked on my desktop computer.
This is the basic built released from the source everyday. The good and the bad of this built is that it is actually only released with basic requirements and files that are meant to be run on its supported models. Therefore, even if this build can be loaded up and run on your hardware, you may not be able to get online anyway. I have tried this build and it works on Compaq CQ 40. But you can do no shit on this.
This build is a custom creation by the technicians from Dell cooperation in a bid to come up with a release that is meant for the Dell mini netbook. I have tried this build on the Compaq CQ 40, and Yayyyyy, this built works for almost everything, except the sound. But no worries, this sound issue applies to the dell computer too and the Dell programmers are working on it to release a build at a later stage that hopefully will have sound support.
Step 2
Installing Chrome OS onto a thumb drive.
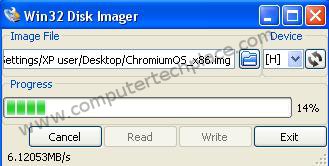
After downloading the build of your choice, you will need to transfer it onto your thumb drive, but note that it is not just copying the file across, you will need to write the bootable image across by using a special process. You will need to use an image writer software for flash drives. Download the Win32DiskImager software and run it.
Choose your downloaded Chrome OS.img file and you can write the Chrome OS over to your thumb drive. Make sure that your thumb drive is hooked up to the Desktop system and detected as a drive. Do not choose the wrong drive letter or it will just delete all your files. Once the program is done with the process, you can simply hook up the thumb drive to your Compaq laptop and reboot. Make sure you have the following settings set correctly in your Bios setup to boot off the USB key. If you are unsure, follow the steps here.
Turn on your Compaq laptop and hit Esc key ( Must be fast )
Hit F10 ( Enter Bios setup )
Go to System Configuration
Boot Options ( Hit Enter )
Boot Order ( Hit Enter )
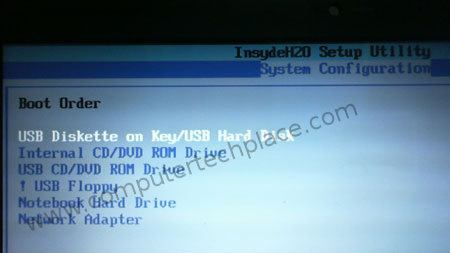
Make sure that the USB Diskette on Key/USB Hard Disk is highlight and selected
Press the F6 to move it to the top of the list.
Hit F10 and say yes to save changes and exit.

This may not be the exact sequence for other Compaq models, there may be some differences in the key to hit and the options may be somewhere else.
With the USB thumb drive inserted into the USB slot of your Compaq Laptop, do a reboot. You should see your laptop boot into Chrome OS.
Step 3
Configuration of your Wi-Fi
It is going to be silly if you are going to think of working on a laptop without Wi-Fi capabilities. Luckily, Dell Laptops comes with Broadcom wireless devices and thus is very similar to the one in my Compaq CQ 40. But before you are able to configure this Wi-Fi, you must be connected via wired. So hook up your laptop to the Ethernet cable and check that you can get online via wired. Do this in Windows mode. If you can surf in the Windows OS, it means you are ready to get connected in Chrome.
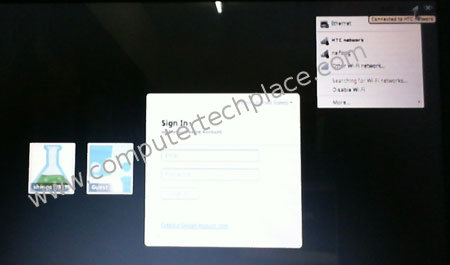
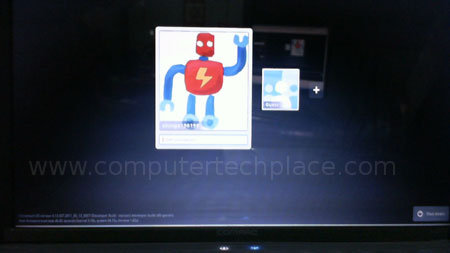
You should be able to see the connected notification in the login screen. Login using your Gmail account user name and password. Now you will need to install your drivers for your broadcom Wi-Fi system.
Press the CTRL + ALT + T together and you will see a black dos prompt looking screen.
Type shell and hit enter
Type sudo /etc/install_wl.sh
Now you can hit ALT + Tab to go back to the main user interface or type exit to close this black dos prompt look alike window.
Hit the power off button to shut down the system. On the next reboot, you should be able to detect Wi-Fi networks on the login screen.
Step 4
Installing Chrome operating system onto your HDD
I won’t advise anyone doing this because in the moment, Chrome OS has limited support and capabilities for anyone to delicate their system totally to running it since running it off a thumb drive is as fast as having it installed into the HDD. Unless you have 2 separate hard disks to play with, you can then opt to do a dual boot of Chrome and your main drive.
One idea I can think off to do a dual boot of Chrome and other operating systems is simple, simply unplug your main hard disk and only hook up the spare drive which you intend to sacrifice for Chrome. Boot up Chrome using the thumb drive that you have created and install Chrome OS onto the HDD using the steps below. Remember, very important, unplug your main hard drive totally off from your system to avoid wiping your main system.
Boot up to Chrome using your thumb drive
Press CTRL + ALT + Tab
Type install and hit enter
Type dell1234 for the password
It will proceed to wipe your hard disk and install Chrome OS onto your computer, laptop or netbook. Note that if the booting off from thumb drive does not work, you do not need to even attempt any form of installation. Because it only means that your hardware is incompatible with Chrome.
After which, for those who are doing dual boot, shut down your computer and hook up your main HDD back into the system. Now you can use the boot selection to boot off from the HDD of your choice. But both operating systems won’t be able to see each other. Windows will see the Chrome hard disk as a corrupted and unformatted drive. Do not proceed to format the drive or Chrome will be gone. But this concept only works for desktop computers because we can put more then 1 drive in it.
I hope this guide is useful to people who want to try Chrome on their Compaq laptops.

Leave a comment