Dual Boot Windows Phone 7 And Android Onto HTC HD 2
Welcome to this article on how to dual boot Windows Phone 7 and Android on a HTC HD 2. Many thanks to the incredible folks at xda developers site, they have managed to come up with methods that we can install boot Android on a HTC HD 2 that has been flashed with Windows Phone 7. There are a couple of different methods out there, but in this example, I will choose one of the more easier and direct ways out there.
Step 1
Install HSPL

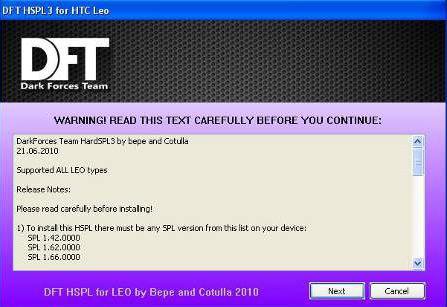
The HSPL is a crack that will allow us to install custom roms onto the phone. It is all these custom roms that will permit the successful booting of an Android operating system. The stock Windows mobile will not allow Android to boot up. You will need to download one of the HSPLs out there to hack your device. Hold down the volume down button as you are powering up your device to see the tri-colored screen. The SPL version will be shown on the screen. Take note of that and use the HSPL that works for your SPL in your device. Do not flash if you do not have the SPL that is supported by any of the HSPL programs. Hook up your device to your computer via usb and allow it to be connected and sync via activesync before you start the flash program. HSPL 2 or HSPL 3
Step 2
The radio firmware is an upgrade software that will allow the hardware in the device to work and communicate with the radio waves. Different operating systems work with different radio firmwares and thus we need to flash a radio firmware that happens to work with both operating systems. Install the newer radio. Similarly, hook up your phone and allow it to connect to the computer via activesync before you start the flash upgrade program.
Step 3
Install the MAGLDR
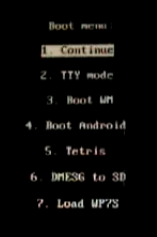
The MAGLDR is a special boot loader that allows users to perform special functions like flashing the Android builds directly into the internal memory. Therefore in this case using the MAGLDR can be used to install the Windows Phone 7 onto the HTC HD 2. Similarly, start the flash program after the phone is connected to the computer via activesync. You will get a special text menu upon reboot of your system.
Step 4
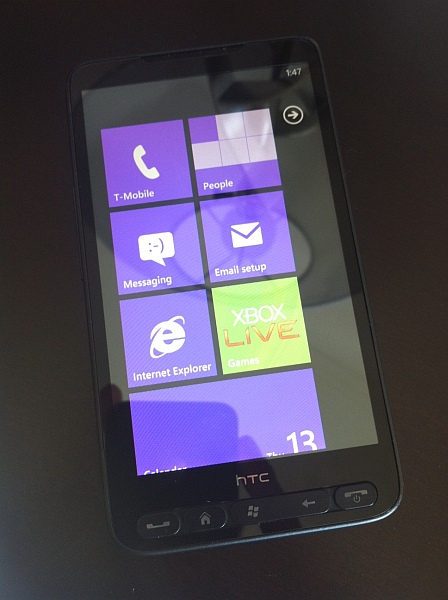
With the HTC HD 2 still hooked up to the computer, navigate using the volume up and down buttons to option 5. ( USB flasher ). Wait for it to be connected to the computer, you will see a simple text that ends with “USB … USB” on the HTC HD 2. You can now run the Windows Phone 7 custom rom installation program to proceed with the flash. At this point in time, all information in the SD card will be deleted. Do backup your SD card if you wish to retain any information. After rebooting, you will enter Windows Phone 7 automatically.
Step 5
Partitioning the SD card for Android
Shut down the phone and remove the SD card. Avoid removing the SD card before the phone is entirely off or it will detect that something is not right and will refuse to read the entire partition correctly even after the whole partitioning is done. One tip to ensure that this procedure does not go wrong, you can reboot the device and hold on to the “red hang up” button to enter the MAGLDR menu before you remove the SD card. Because at this point in time, Windows Phone 7 is not loaded yet, and thus is entirely shut off. It is difficult to get the correct assessment of when the device is really shut off.
Download the EASEUS partition software.
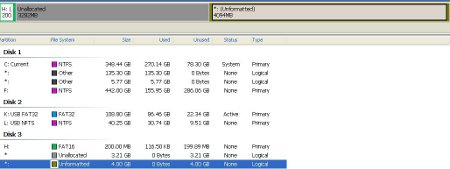
Insert the SD card onto the computer’s card reader, it will show up on the computer as an additional drive. Identify the drive that has the amount of storage that is similar to your SD card. You will also be able to tell the drives apart by identifying a drive that has a 200 meg space in front and a large unformatted space for the rest of the drive.
Right click on the unformatted space and select delete, right click on the large partition again and select “create”. Drag and resize the partition so that it has the space moved to the back of the SD card. Take note not to over resize as it will result in a flip around where by the unformatted partition jumps in front of the empty space. Do note that you will need to set the specifications so that the partition remains “unformatted” and not to fat32 or any other type of format. Click on “Apply”, the second button at the top left side of the menu.
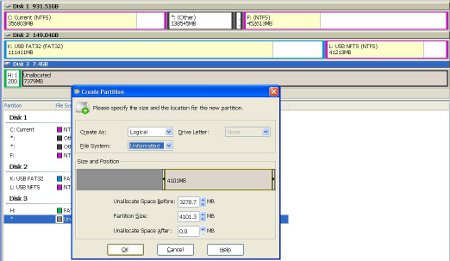
You will get an outcome that is very similar to what you see in this image.
Remove the SD card and insert it into the HTC SD. Allow it to boot into Windows Phone 7 once. At this point in time, you will need to check the “settings” => “About” to see if the storage space is now registered as a lower value that you have partitioned. If the value is correct, you can remove the SD card with the procedures above taking extreme caution not to remove the SD card when the device is still on. Else, hit the reset device option in the same screen to reset the SD card and re-do the partition and formatting again. This step of removing the SD card and inserting into the device just to read the space is a require procedure. Windows Phone 7 will finalize the information, or else the whole partitioning will be deleted and removed even if you have done the whole partition correctly.
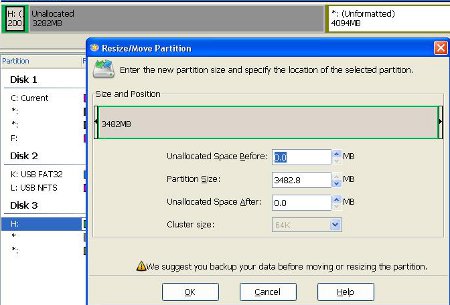
Insert the SD card into the computer’s card reader and continue with the partitioning. Back to the EASEUS partitioning program, click on “view” and “reload disk info”. Right click on the 200 meg fat16 partition and select “resize”. Drag the whole partition until it fills the entire unallocated space. After that, right click and select “format”. Change the format type to “fat32” and file cluster to “32 KB”. Click “apply for the changes to take effect.
Now you should be able to see your SD card drive show up in your computer with the amount of space you created in the SD card. This is your first half of your SD card that can be used as the Android drive. The other half of the “unformatted” partition is the space that the Windows Phone 7 will use.
Step 6
Install your Android
 Simply copy the Android build of your choice onto the SD card’s partition. After that, when ever you wish to boot into Android instead of Windows Phone 7, press and hold on to the “power up” button when you are powering up the HTC HD 2 to enter the MAGLDR. Then using the volume buttons, you will first need to set the Android build location first. Go to option 10 (Services) and set the source directory of your Android. Then after which you can use option 2 to boot the Android build. But it is important to note that not all Android builds will work. Therefore you may need to ditch your favorite Android build for another. I have messed around with a few builds and in general, most of the Desire HD builds will run with no issues. One example will be this HTC DesireZ 2.1.
One pro and con of this build is that it is very slow and laggy if you did not do the special Linux partitioning of the SD card to prepare it with additional swap file. But if you do the 3 partitions for this Android build, it will run real fast with a huge difference. I will be writing the guide on how to partition the SD card for Android real soon.
I hope all readers enjoy this article on how to dual boot Windows Phone 7 and Android in a HTC HD 2.


Leave a comment