Install XP After Windows 7
 Welcome to Computertechplace guide on how to install Windows XP after Windows 7. Most computers now come pre-installed with the newer Windows 7 operating system. But a lot of users still prefer the older Windows XP which is still a lot compatible with most programs and takes less resources.
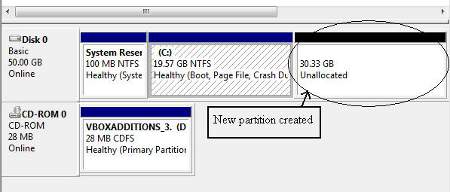
Before you begin the installation, you will need to partition your drive first to make space for the Windows XP to reside in. You can make use of partitioning softwares to create an additional drive first. You can also make use of Windows 7 to create the additional partition.
Step 1
Open the Control Panel and search for “partitions”. You will get a “Create and Format Hard Disk Partitions” in the “Administrative Tools” category. You will be able to open up the disk management utility for Windows 7
Right click on the drive and select the option “Shrink Volume”. You can key in the values and resize the drive to your desire size. The new volume will show up as a free space. Now you can pop in your Windows XP installation disc and do a manual reboot.
Step 2
Remember to set your drive as the first bootable medium and the installation for Windows XP should kick off automatically. The only thing to note is not to select the wrong partition space that is meant for the Windows XP. Once you are done with the installation of Windows XP, you will not be able to boot into Windows 7.
Step 3
Now you will need to proceed to modify the boot loader. The program you need to download and install is EasyBCD. But before that you will need to install Microsoft .Net Framework or else that EasyBCD program will not work.
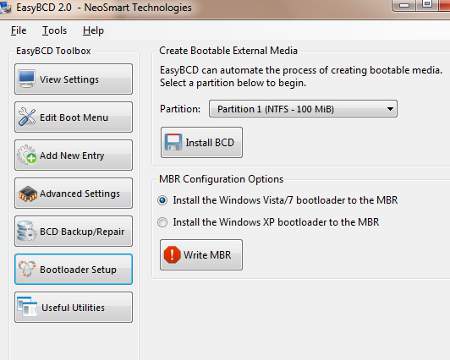
Click on “Bootloader Setup” option and select “Install the Windows Vista/7 bootloader to the MBR”. After that, click on the red “Write MBR” icon to complete the inserting of the Windows 7 boot record into the menu.
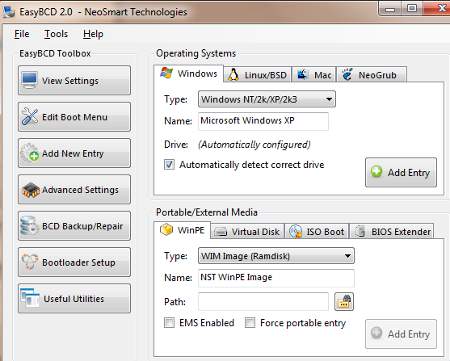
The second step now is to re-create a boot menu with Windows XP included. Select “Add New Entry” option from the left menu and choose “Windows NT/2K/XP/2k3” for “Type”. Key in “Windows XP” for the Name and allow automatic configuration of the drive. Click on Add Entry to finish with the job.
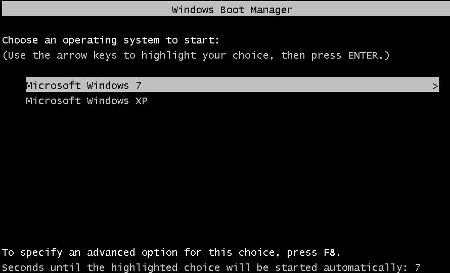
Reboot and you should get to see a boot menu with 2 operating systems for you to choose from.
I hope this article on how to install Wiindows XP after Windows 7 is easy enough to follow and understand.


Leave a comment